
Our Solar System
August 03, 2012

There's a lot to think about when you decide you want to live in an RV, a lot of preparation. If you want to do it self-sufficiently like us, there's even more to think about. We want to be able to sustain ourselves and not rely on someone else (this is our reason for the RV in the first place). The freedom of being able to stay in places with no "hook ups" is very desirable to us. Plus, why pay for the basic needs when we can get them for free, from nature?! We realize that the set up phase for supplying our own needs will take some initial investment, but the investment will pay off over time, not just dollar wise, but freedom wise also. In this blog post we will cover a major self-sufficiency issue - how to supply ourselves with the power we will need in order to keep www.bear8photo.com up and running while on the road!
Our research found that there are two main options for providing your own power in a RV, wind collection and solar collection. We researched both, and came to the conclusion that solar would work better for us. If you live in a constantly windy area, it may work for you, but since we plan on traveling to tons of different areas, we figure the sun will be easier to come by, and more consistent than wind.
Now that we knew we wanted a "solar system" as we like to call it, the next step was to somehow figure out what system was best for us. Solar set-ups are pretty basic. There are four main components to a common solar system - a solar panel, a charge controller, a battery bank, and a power Inverter (you could however do it without a power inverter if you ran only DC powered devices). The solar panel collects the sun, obviously. From the panel power travels through wires into what is called a charge controller. A charge controller’s function is to prevent the batteries from becoming over-charged. It will regulate the solar panel’s output down to 0 amps if the batteries are fully charged. The best type of batteries to go with for solar systems are; SLA (sealed lead acid) a.k.a AGM (absorbent glass mat). It is important to limit battery drains below 50% charge. A drop below 50% charge will shorten the life of the battery. A power inverter’s function is to turn the DC battery power into AC power. Everything that you plug into a standard wall outlet is AC. You may have to do some tests to determine what is DC and what is AC in your set up. Like we mentioned before, it is possible to get DC devices, and skip this component. If you do go with an inverter, we suggest getting a pure sine wave inverter. They run cleaner power and are quieter than the "more industrial" inverters. Pure sine waves are also safer for expensive electronic equipment. We'll move on from all that for now. If you have any questions about things we did not cover, feel free to post a comment or question below.
After we knew what the basic components were, we started the calculations. We are not going to get in to the numbers here, but there are a few sites out there that will help you estimate how much power you will need the solar system to supply. Just Google "solar calculator". The trick is to balance the system so that the panel will be able to fully recharge your battery bank every day. Again, this does take some calculations, but this blog should give you a good idea what works for us, so you can compare our uses to your own.
Ok, so what did we choose to go with after all those "calculations"!? There are a few brands out there, but we decided to go with mostly GoPower Components.
- (1) GoPower 145 Watt Solar Panel
- (1) Go Power 30amp Charge Controller
- (1) Go Power 1500 Watt Pure Sine Wave Power Inverter
- (2) UPG AGM 110ah Deep Cycle Batteries
Now for the Install:
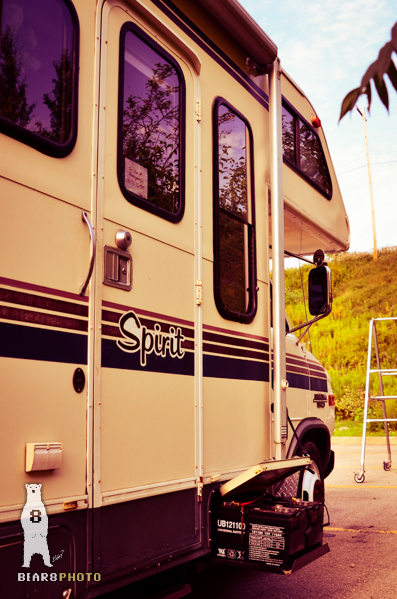
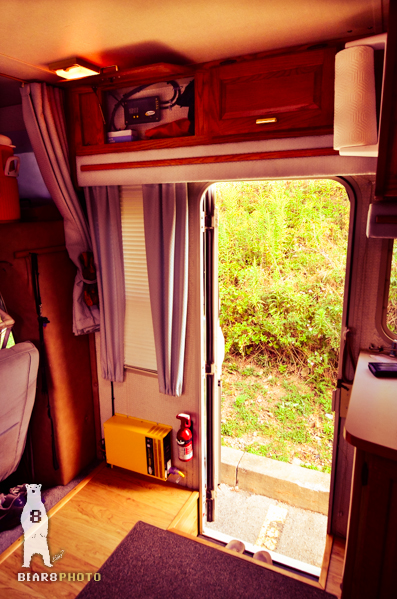
We decided to the best option for us was to tie into the existing battery system already on the RV. The existing auxiliary battery system had two batteries, so it would be easy to put our new beefier batteries right where the previous batteries went. Keeping the batteries in this spot enables us to keep all of the features the existing batteries were capable of. The placement of the batteries determined the placement of the 3 other components mentioned above. It is best to have everything as close as possible, so we have the panel on the portion of the roof directly above the batteries. We fabricated our own bracket and mount for the panel. The panel it is able to tilt two ways to about 45°. In between the panel and the batteries sits the charge controller and the inverter. How it works is the sun hits the panel on the roof, the panel wires go into the charge controller, wires from the charge controller go to the batteries, then from the batteries to the inverter. We chose to then hook the power from the inverter into the existing AC distribution panel. This way all of the existing outlets in the RV work off of the AC power provided by the inverter. Another reason for installing the new batteries in the existing location is because they will be tied into the existing power converter/battery charger. It should be noted that the battery charger should be disabled while not connected to shore power. Failure to disable the battery charger while not connected to shore power will result in a "loop". The System will be constantly converting DC to AC, AC to DC, and so forth. This loop will drain the batteries quickly. We have used the battery charger to charge the solar batteries in the past, but as of now we rely solely on the sun rays to keep the batteries charged. Below are pictures of the installed components.
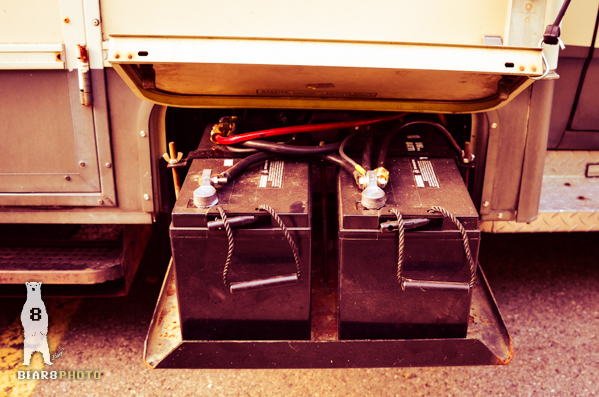
UPG AGM 110ah Deep Cycle Batteries
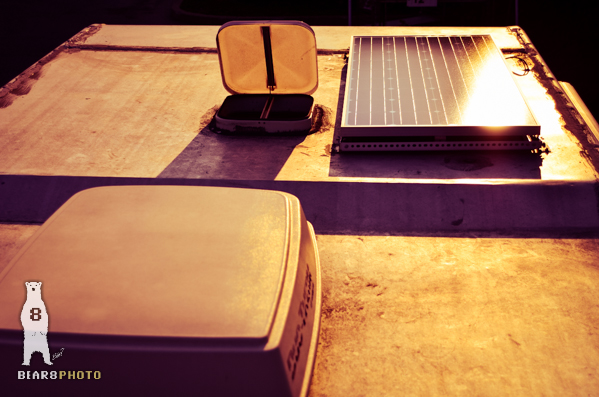
GoPower 145 Watt Solar Panel
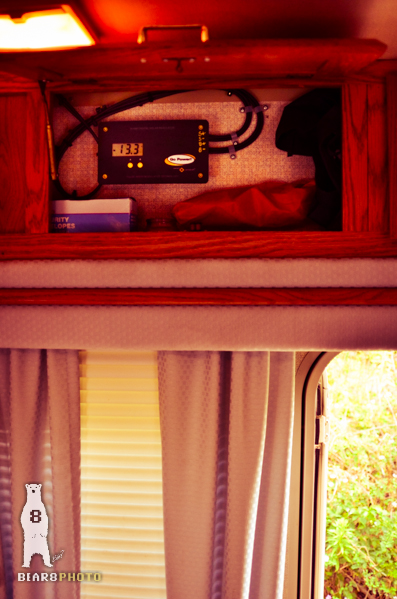
Go Power 30amp Charge Controller
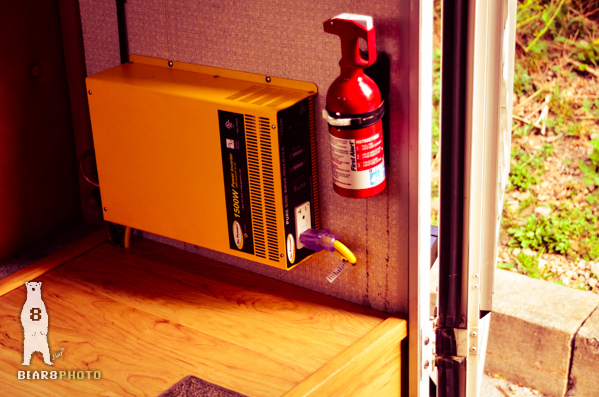
Go Power 1500 Watt Pure Sine Wave Power Inverter
What is this system capable of? The panel provides about 9 constant amps on a good day. With the few things we are running now, the batteries rarely drop below 90% charge. Every morning (as long as there is sun) the charge controller tops off the batteries at 14.2V. The batteries then hover around 13V during the day, and drop to about 12.6 during the night. As of now we are only running small electronics, water pump, water heater, and lights. This system will not run an air conditioner. We looked into it, and the amount of batteries it would take to run an AC is just not practical. As for a refrigerator, that's sort of a sore subject for us... When we bought the RV, it came with a newer fridge. Our solar system did pretty good running the fridge, but we figured we could maybe find one with a lower power draw. The issue was that the batteries were recharging during sunny days, but wouldn't reach full charge on rainy or overcast days. So we sold that fridge and got a new one. What a mistake! We have tried two other fridges now, and none run as well as the original one we had! So right now we are fridge-less. We are thinking about going with a propane fridge in the future, but for now, we'll survive without one!
After it's all said and done we appreciate the power that our solar system provides but the fact is, solar has its limits. It is fine for us though. We value the freedom it gives us, more than the things it fails to provide. It feels good to be providing our own power (with the help of the sun of course), and that is worth something. We hope you have learned something and enjoyed this solar system talk. Feel free to ask questions or make comments!
All artwork represented here is original and copyright © Bear8Photo
